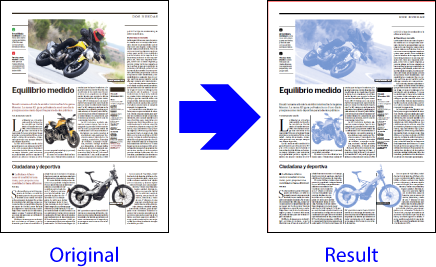
This is the second of the examples we are giving on how to create a list of actions. In this case, we will make an action that will convert all the images in a PDF to a spot ink (Pantone 300 C) and the rest to black CMYK.
Warning: In this second example we will not explain the details already discussed in the first example, so if something is unclear, it may help to refer back to it.
Also, to simplify the list and our explanations, we assume that the PDF to which it is applied is already in CMYK.
Creating the list, step by step
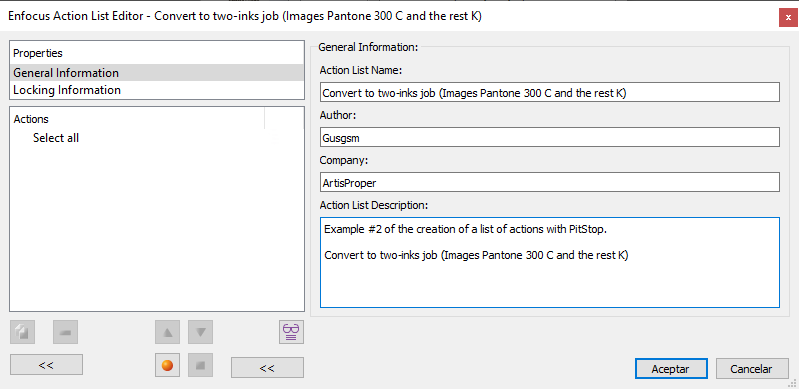
We start by creating a list of actions from scratch, with an PDF open (so that we can see the results of what we do). We give the list a meaningful name and add the necessary data.
Changing images to Pantone 300 C
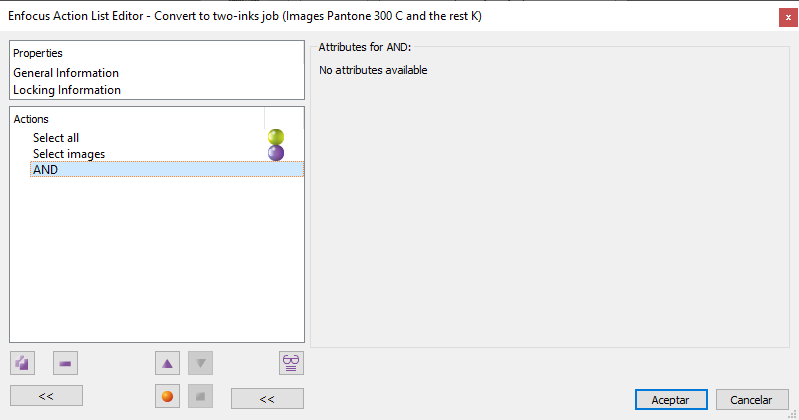
The first thing we will do is to convert only the images to Pantone 300 C. To do this, we keep the "Select all" command, which is added by default to all new lists, but then we will delimit its effect by adding the "Select images" command followed by the "AND" operator.
By doing this, what are telling PitStop is "Select all and, from that, keep selected only those elements that are images". This way we will leave only the images selected (and we will have learned how to use a logical operator).
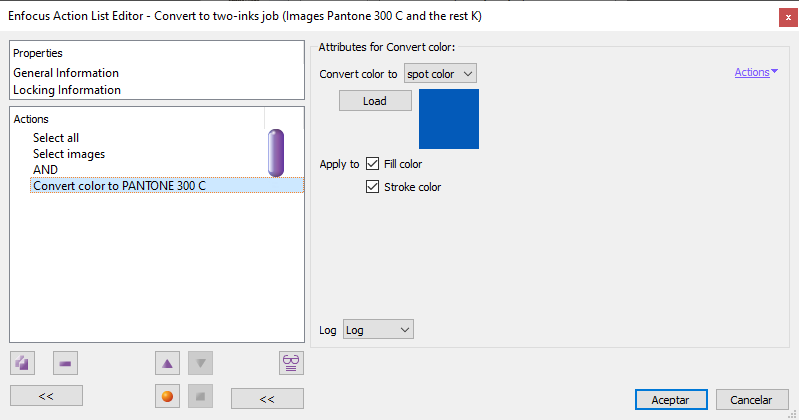
Now, to change the images to Pantone 300 C, we add the command "Convert colour". In it, we choose the option "Spot colour".
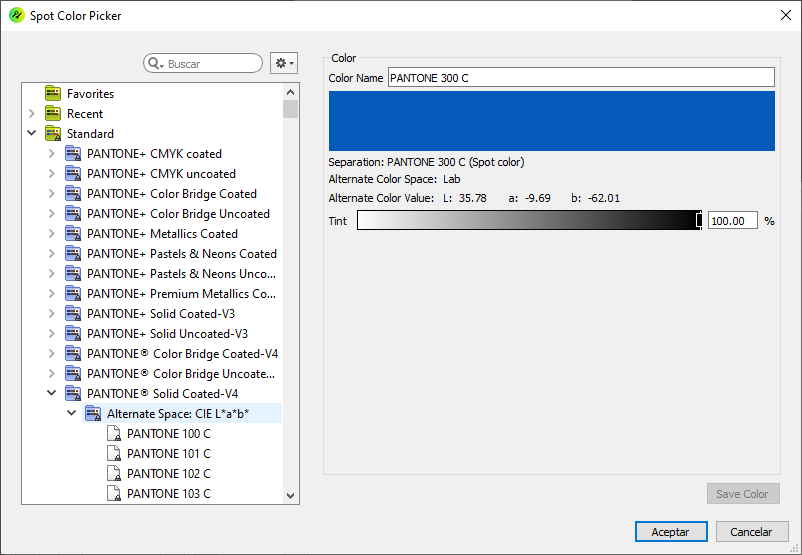
In the "Colour Picker", which will pop up when we click the "Load" button to call the PitStop spot colours, we select "PANTONE 300 C" from the "Pantone+ Solid Coated-V4" library, (CIELAB alternative colour space).
Change the rest to Grayscale Black
Now we want to modify everything that is not an image to convert it to greyscale. To do this we have to make a new selection that includes everything except the images.
Warning: If we don't make a second selection, we would be still modifying the previous selection. Remember: Every time we want to change a different element we have to make new selection commands.
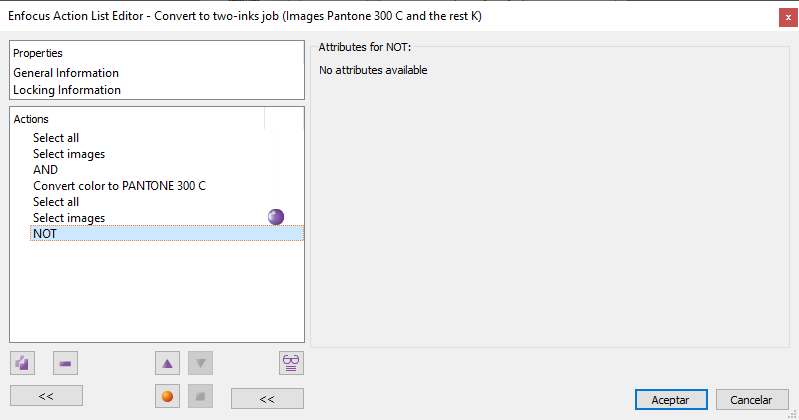
The sequence we add now will be very smilar to the one before: "Select all", "Select images" and the "NOT" logical operator. In this case, we will be telling PitStop: "Select all and, from that selection, exclude all images" (and we will have learned to use a second logical operator).
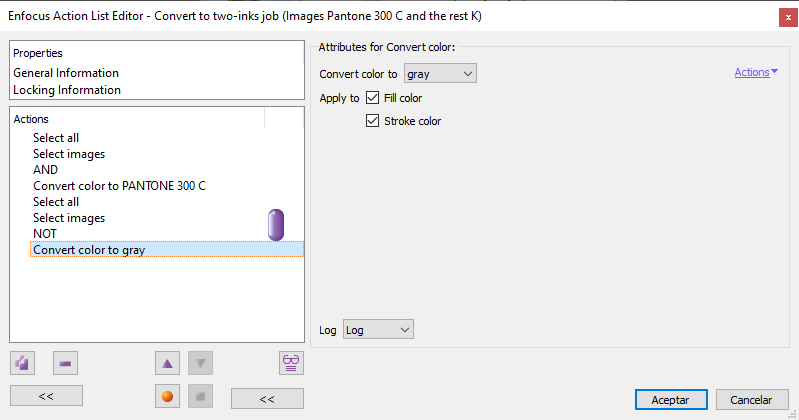
Now, we add a second "Convert Colour" command, in this case to "Grey".
A couple of final details
Although we have already changed the colours as we wanted, we should refine the list of actions a bit. Now we don't have to make new selections because what we want to modify everything but the images.
Darkening grey hues
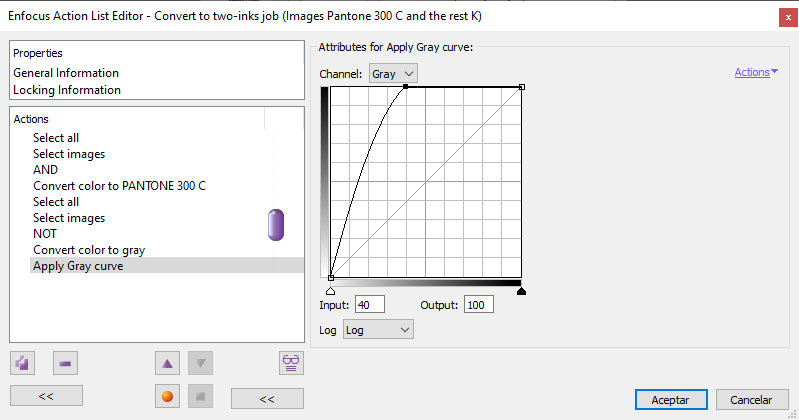
We add a command "Apply Grey curve" to force up to "100%" any level equal or higher than "40%". This way we will avoid grey hues in texts or any other element but in the lighter tones (30% or below). So, everything will be basically black.
Change greyscale to black CMYK
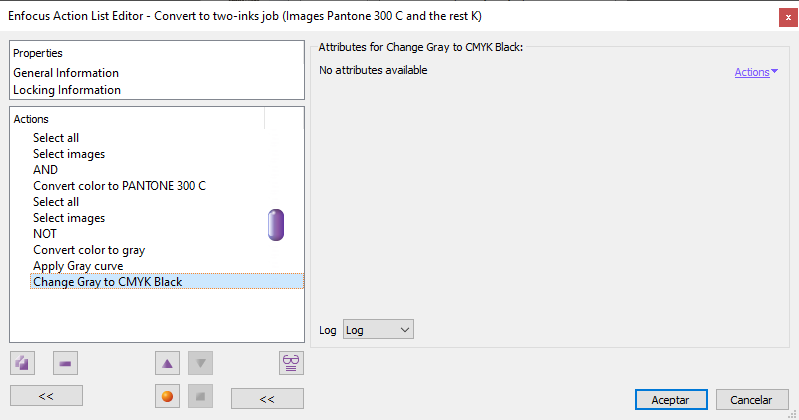
Next, we change whatever is defined in greyscale colour mode to "CMYK" black only with the command "Change grey to CMYK Black". This way we will avoid possible problems in printing.
Conclusion
We save the list by pressing the "OK" button and then we check that it works all right with the document we have open.
If we are satisfied with the result, we have finished our second list of actions.
[© Gustavo Sánchez Muñoz, 2026] Gustavo Sánchez Muñoz (also identified as Gusgsm) is the author of the content of this page. Its graphic and written content can be shared, copied and redistributed in whole or in part without the express permission of its author with the only condition that it cannot be used for directly commercial purposes (that is: It cannot be resold, but it can form part as reasonable quotations in commercial works) and the legal terms of any derivative works must be the same as those expressed in this statement. The citation of the source with reference to this site and its author is not mandatory, although it is always appreciated.