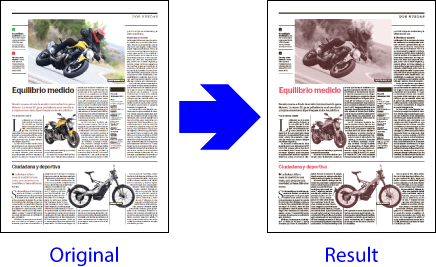
This is the fifth examples of how to create an action list. In this case, we are going to modify a list that will convert a PDF to a duotone of black and a spot colour (in the previous examples, the duotones were two process colours).
The aims of this example are:
- Showing how to modify an already created list to fit our needs (the list we use as a starting point is the one we created in example 4 to create a duotone with two process inks).
- Teaching how to select a particular type of texts in order to modify them.
Warning: As we are doing with all the examples, we will not explain the details already discussed in developing the examples above, so if anything is unclear, it may help to refer back to them.
Defining the aim and looking for a starting candidate
The first thing is defining our aims, what we want to do with the list. In this case, we want to create a list that converts a PDF to two inks: Black and a spot ink (PANTONE 1787 C). The tricky bit is that the images must be duotones of black and a spot colour. Just one ink is not enough.
So, we search in our system for a list of actions that does almost what we want to do (in order to modify it).
A quite obvious candidate sto start with is a list we have made in a previous example. it does exactly what we want to do but with two process inks. As we are working tidy, we surely have saved it in our system as "Convert all PDF to two process inks (Cyan and Black)", within a group of lists called "Duotones and 2 inks".
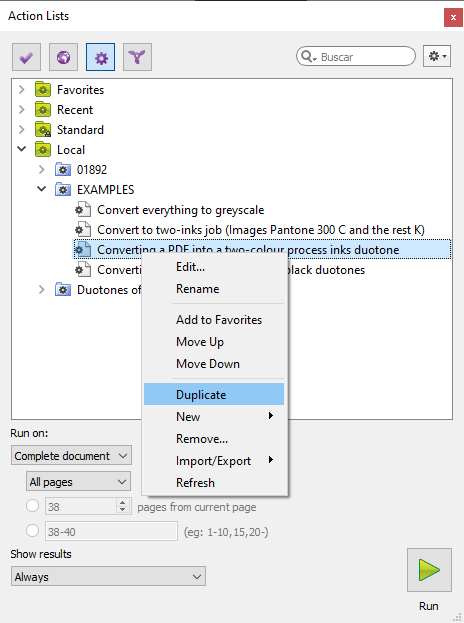
We place ourselves above the name and, with the right button menu, we choose the option "Duplicate". It will be created with the same name and a sequential number "(2)".
Warning: We must remember that if the list of actions that we are duplicating if a preset that comes with the installation of PitStop, we won't be able to duplicate it in the same place (within the "Standard" group), as the only option allowed is to do that within the "Local" group.
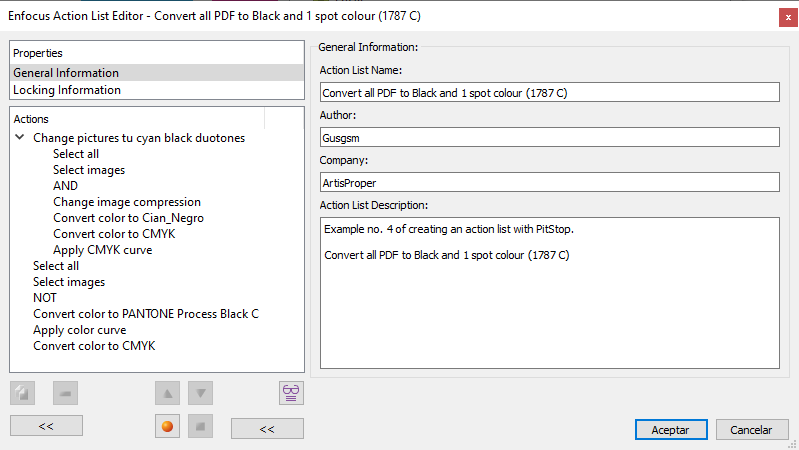
We proceed to change the "Name" to "Convert all PDF to Black and 1 spot colour (1787 C)" and add the necessary "Description" so that any user knows what it does.
The next step is analyzing the action in detail to decide:
-
What to remove (because we are not interested in keeping it). Nothing.
-
What to modify (because it is not what we want to do). We will change the part where images are changed to a spot colour called "cyan_black".
-
What to add (because the list doesn't do it yet). We will add some changes at the end so that some texts pass to the new spot ink and not in black.
Modifying the starting list
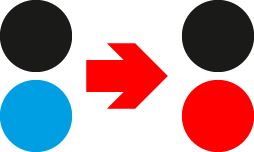
We may be tempted to replace the "Convert colour to Cyan_Black" step with a "Convert colour to PANTONE 1787 C" step. But we would not achieve what we want (that the images use two inks at the same time). This command does not do that.
The next (and right) option is to keep that step and then convert the cyan in the images to PANTONE 1787 C spot colour. This can be done in a very simple way.
So, we go to the point where the command "Convert colour to CMYK" is (after the "Cyan_Black" conversion) and we include after it a new command in the list.
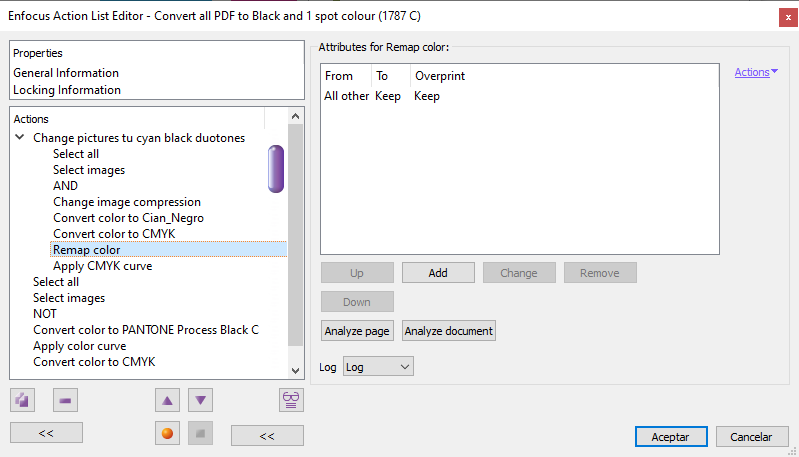
Now we add the command "Remap colour".
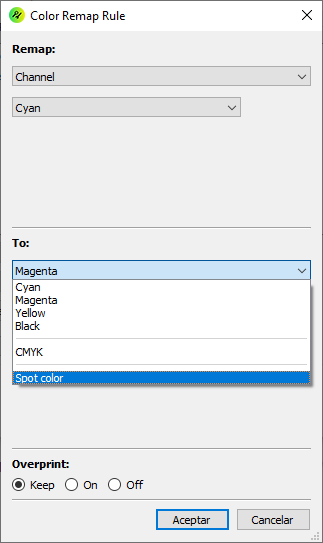
This is a complex command, but we do not need to delve deep into it. We just click on the "Add" option. There we choose "Remap: Channel" and select "Cyan". In the area "To:" we choose "Spot colour" and click on the "Colour picker" icon.
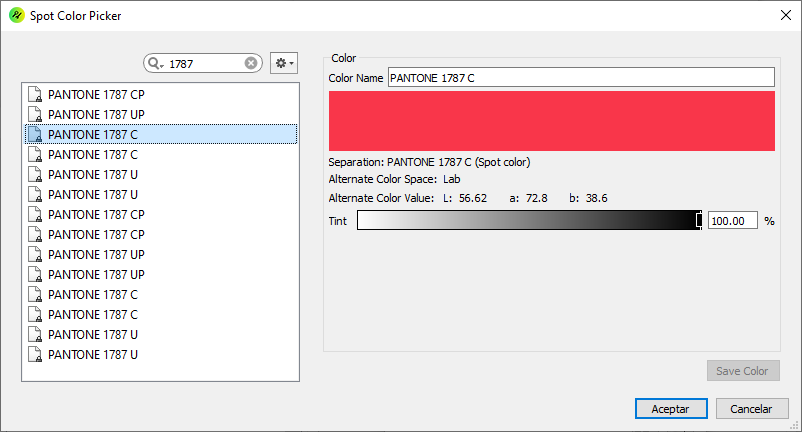
In the "Search" window of the "Color picker", we type "1787", so the one we are looking for appears listed. We select it and then click "OK".
Warning: If a colour appears listed more than once, this is because PitStop stores it with different colour definitions (because they belong to different colour catalogues or they have different alternative colour spaces).
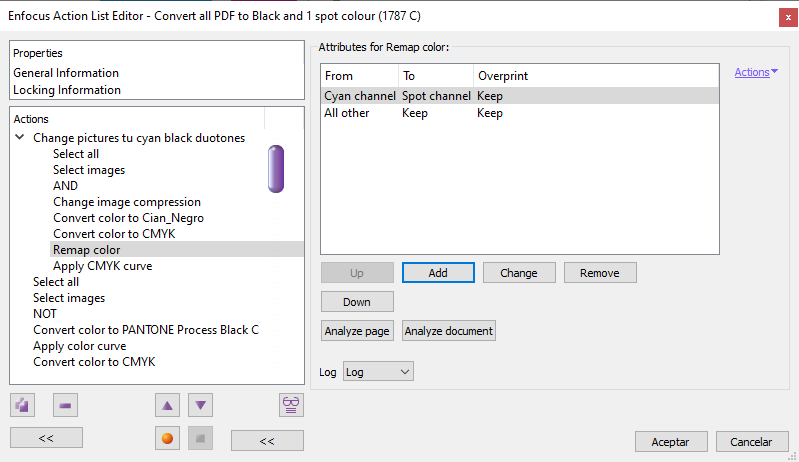
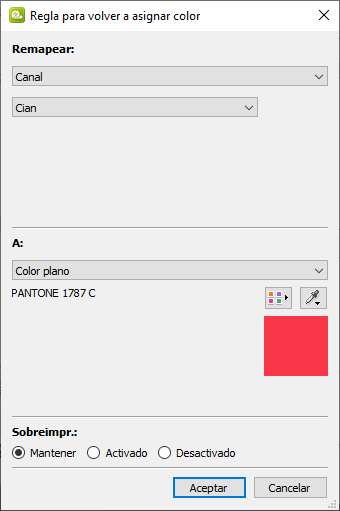
In this command there should only be one other option "All other: Keep", which means that any other colour should not be changed.
If we wanted the duotones to be two spot colours, all we would have to do would be to add a change to the "Black" channel similar to the one made to the "Cyan" one and remove some of the conversions to CMYK. As simple as that.
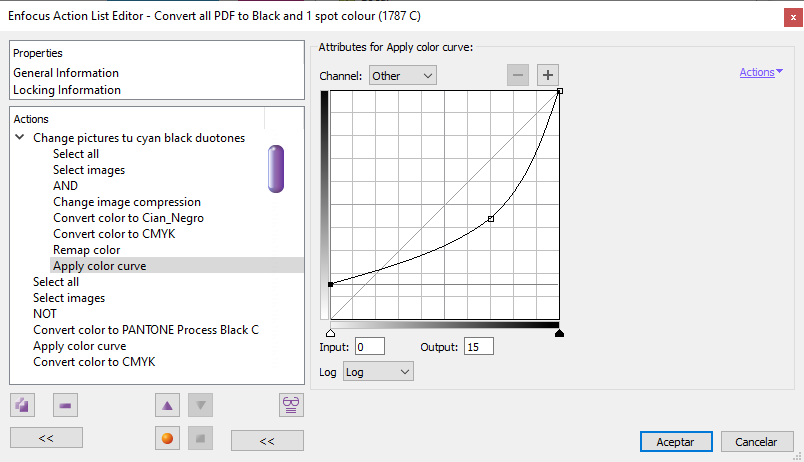
Now, we select the following command "Apply CMYK curve" to delete and replace it with "Apply colour curve". In this new command, we modify the "Other" colour curve with values similar to those of the "Cyan" curve (or whatever values that work better with thes colours, it depends on the luminosity of each swatch, there is no fixed rule).
The subsequent commands that modify non-image elements to black "CMYK 0/0/0/100", we leave them as they are.
Enlarging the list
To spice up this list of actions a bit, we'll finish it by changing the titles of the page to the spot colour "PANTONE 1787 C".
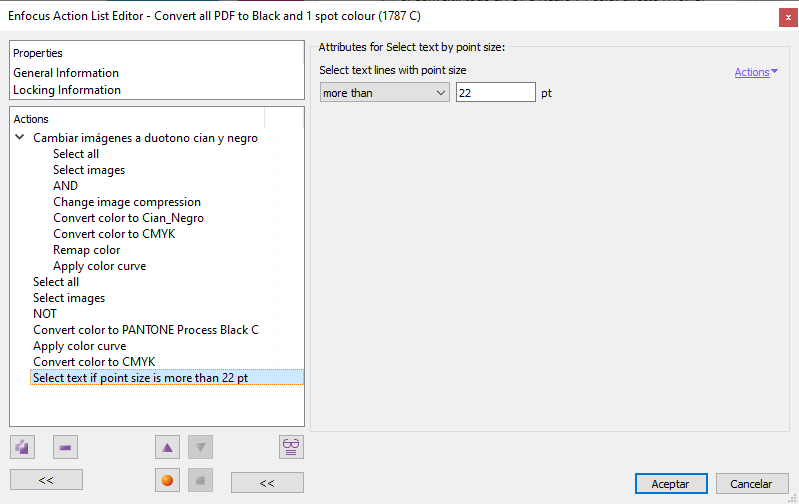
We select the texts larger than "22 points", (that is, the headings) with the command "Select by point size".
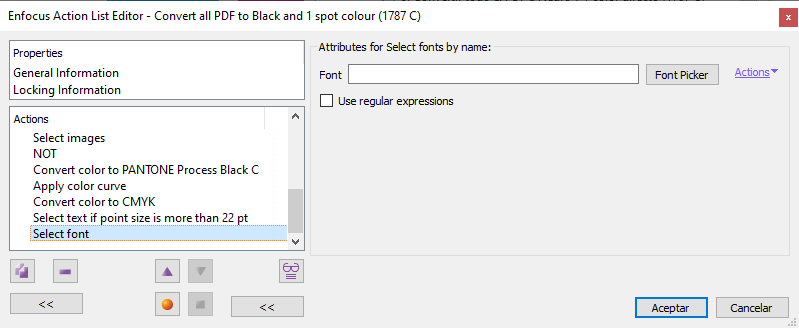
And, to avoid changing the drop caps (which have a large body), we will limit this selection to texts in the BentonSans-Bold font with the command "Select font by name".
We could can type directly the name of the font (or part of it). or we could check the "Use regular expressions" checkbox if we wanted to select all instances of a font, regardless of its variant (italic, bold, etc.). For this, this option would work best.
However, the rub working with fonts lies in that the name we know in a font menu may not be exactly the same as the name being used inside the document. It may have a space included, or a capital letter, etc. Therefore, the easiest way to use the "Select font" command is to click on the "Font picker" button.
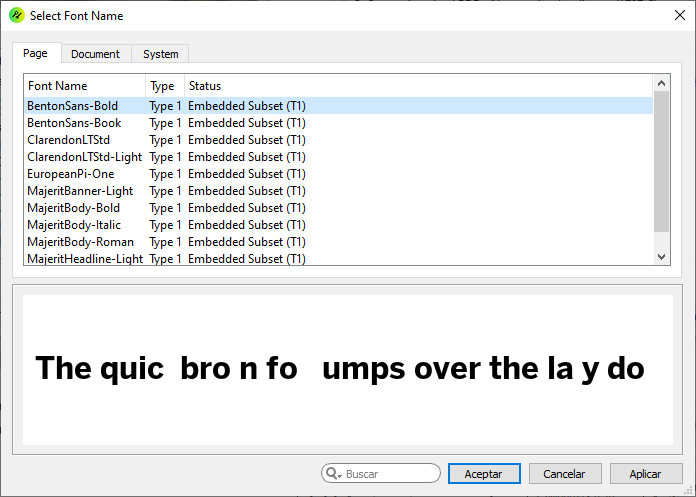
Once inside the "Font picker", we should click on the "Page" or "Document" tabs, which show the fonts used in those places. There, we look for the one we are interested. When found, we place the cursor over its name and click "Apply".
Next, we add an "AND" operator. Since, as we have learned, we must use operators to delimit selections.
Warning: If we would not add this "AND", the second selection would override the first one. The "AND" operator makes the sequence mean: "Select texts larger than 22 points and, from these, select only those in the font Benton Sans Bold". Otherwise, the sequence would mean "Select texts larger than 22 points. Now, forget that selection and select the ones in Benton Sans Bold font".
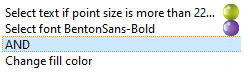
If we put the cursor over the "AND" operator, we will see that, as we have explained in the pages about selections and the logical operators, green and purple bubbles appear to the right of the previous selections. This indicates which orders are affected by each operator.
Now, we could add for a second time the change command "Convert colour to PANTONE 1787 C". The problem is that it changes one colour to another proportionally and we don't want that. We want a command that changes to a value of 100%, without proportionality or variations.
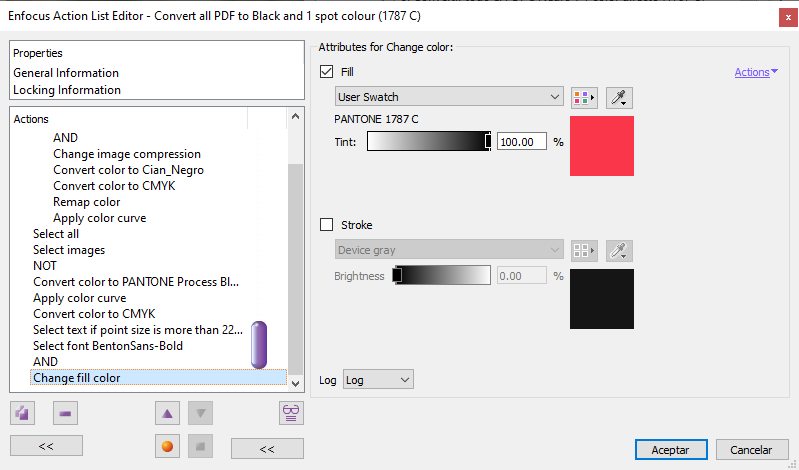
Therefore, we now choose to add a "Change colour" command, marking only "Fill" and choosing again "PANTONE 1787 C", now with a "Tint" value of "100%" (an option not allowed by the "Convert colour" command).
Conclusion
We save the list by pressing the "OK" button and we check it with the document we have open. If we are satisfied with the result, we have finished our list of actions.
[© Gustavo Sánchez Muñoz, 2026] Gustavo Sánchez Muñoz (also identified as Gusgsm) is the author of the content of this page. Its graphic and written content can be shared, copied and redistributed in whole or in part without the express permission of its author with the only condition that it cannot be used for directly commercial purposes (that is: It cannot be resold, but it can form part as reasonable quotations in commercial works) and the legal terms of any derivative works must be the same as those expressed in this statement. The citation of the source with reference to this site and its author is not mandatory, although it is always appreciated.