
This Enfocus PitStop command allows us to rasterize a selection by converting it to pixels with the chosen resolution, colour mode and compression. If nothing has been selected, the command will affect all elements that can be rasterised.
The dialogue window may look very complex, but this is only because the parameters of this rasterisation can be very fine-tuned.
Warning: Several of these options show a warning triangle next to them. That means that choosing that option is likely to produce very obvious visual changes from the original.
Besides, on each page, the selected and rasterized elements will form a rectangle, whose sides will be the objects furthest apart. The space in between will be rasterised as well.
Raster resolution and quality
- "
Resolution (ppi) of generated bitmap": This option allows us to choose which resolution in pixels per inch we want for the result of the rasterisation. With the options "Compression" and "Quality" we choose both parameters. The possibilities are the usual ones in PitStop. Whether the image is in greyscale, RGB or CMYK depends on the original colour type and the options chosen below. - "
Use anti-aliasing": This option smoothes the edges of tonal and contrast zones of difference. It is advisable to activate it especially in the case of low resolution rasterizations (for screen use). - "
Convert new resulting image(s) to indexed color space": If this option is chosen, the resulting image will be converted to an indexed colour mode, which in cases of graphics with few colours makes a lot of sense and, if there are many images, can greatly reduce the weight of the resulting document.
Colour modes for the rasterization
"
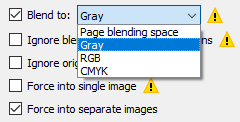
Blend to": This option allows us to choose which colour mode convert the selection to. All content will be converted to the selected mode. There are four possibilities:The first three are "
Grey", "RGB", "CMYK", all of them with colour profile.Warning: The colour profiles you have as PitStop colour management presets are applied, not Acrobat's).
The "
Page blending Space" option uses the colour mode that was set as "Transparency Blending Space" when the document was created. So, for example, if the PDF was created in Adobe InDesign, for example, in CMYK with some transparency, the transparency blending space used is CMYK.
Some details
- "
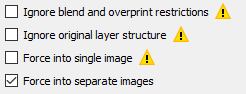
Ignore blend and overprint restrictions": If there are elements with transparencies or overprinting over other elements, this option must be checked so that PitStop can rasterize these areas. Otherwise, it will not include them in the rasterization. - "
Ignore original layer structure": If this option is checked, PitStop will disregard any hidden or 'not to print' layer values in the PDF and it will include them completely in the rasterizartion. This may cause hidden elements to appear. "
Force into single image" and "Force into separate images": With the first of these options, the result will be a single image including the white spaces in between elements; with the second PitStop will try to respect the blanks in between elements as such and it will create as many images as needed.Warning: Both options are mutually exclusive and selecting the single image option automatically activates all three.
"
Keep the original content and place the new resulting image(s)…": This option allows us to keep the content we are rasterizing and choose in which order to place the rasterization result, in front of or behind everything already in the page, or in front of or behind the original content.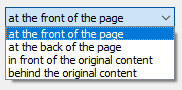
If we do not choose it, the original content is deleted and only the rasterization result remains.
[© Gustavo Sánchez Muñoz, 2025] Gustavo Sánchez Muñoz (also identified as Gusgsm) is the author of the content of this page. Its graphic and written content can be shared, copied and redistributed in whole or in part without the express permission of its author with the only condition that it cannot be used for directly commercial purposes (that is: It cannot be resold, but it can form part as reasonable quotations in commercial works) and the legal terms of any derivative works must be the same as those expressed in this statement. The citation of the source with reference to this site and its author is not mandatory, although it is always appreciated.