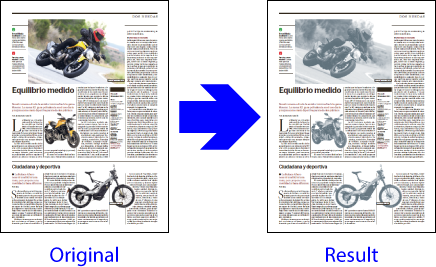
This is the third example on this website of how to create an action list with Enfocus PitStop. In this case, the action list will convert all pictures in a PDF to duotones in cyan and black (two process inks), without altering anything else.
Later, on another page, we will embed this list within a new list to learn the usefulness of embedding action lists within other lists.
Warning: As we are making these examples in a progressive way, we will not detail here many of the operations that we already discussed in the previous lists. If any procedure here is not clear enoug, please, refer back to the previous examples.
Creating the list, step by step
This list is slightly more complex than the previous examples were. Let's see how it is created step by step. The stack of commands is:
- Making a new special spot colour.
- Selecting all pictures.
- Change their compression mode so that they are not in JPEG.
- Convert them to a spot ink of cyan and black.
- Convert them to CMYK
- Apply a curve to the cyan of the pictures.
Making a new spot colour
The first thing, before starting the list of actions, is creating a spot colour called "Cyan_black", which is composed of Cyan and Black (hence its name).
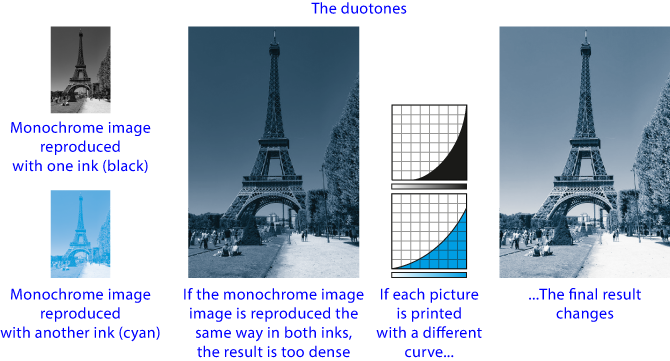
Warning: We are doing this because it is the easiest way to create duotones, which are nothing more than monochrome elements with the same content reproduced with two inks (or plates) and the only difference that one or both of them have a reproduction curve applied (usually different).
In this list of actions, this way of creating a two-inks spot colour is a trick that works because both are two process inks (i.e. CMYK). If one or both were spot colours, the procedure and sequence of commands would have to be different (as we will see in a later example where just that is done).
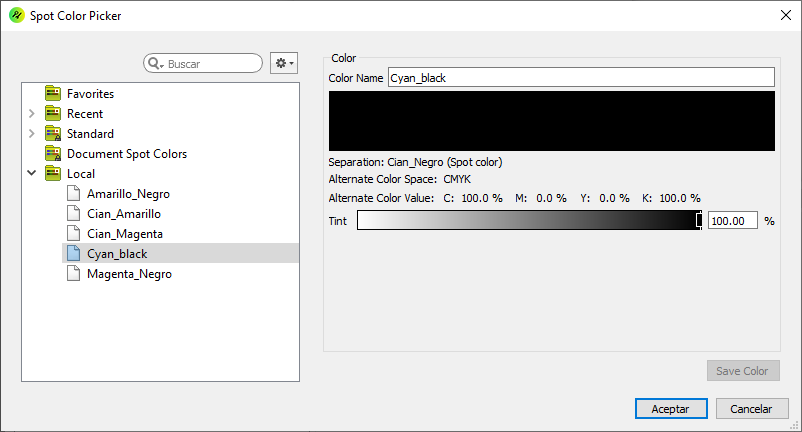
To create the new ink "Cyan_black", we go to the PitStop tool menu "Colour" and then we choose "Color picker".
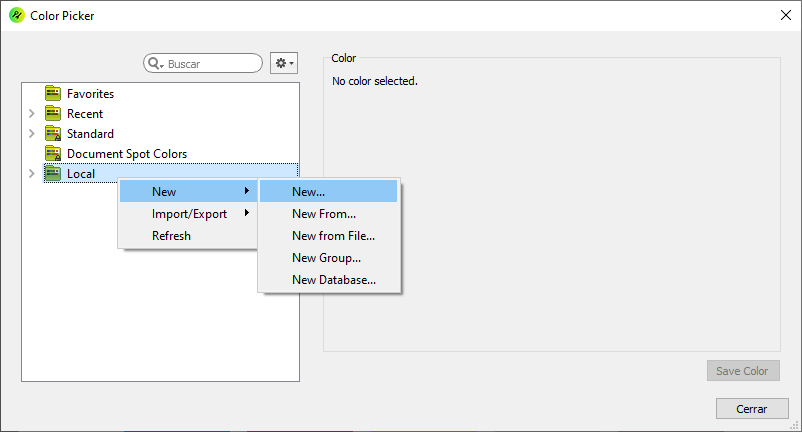
There, we choose the option "New - New" to create a spot colour from scratch.
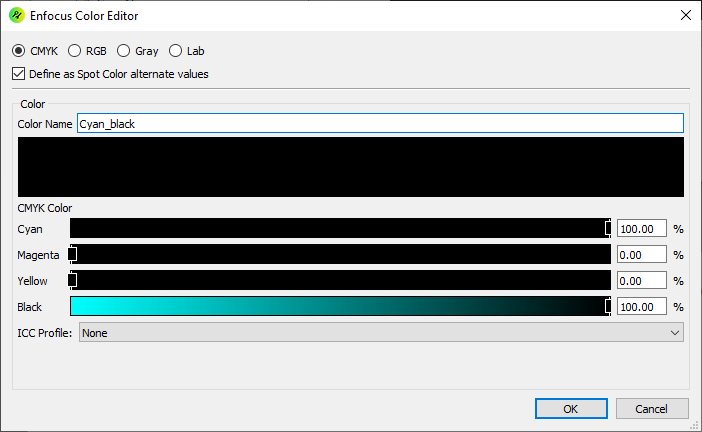
We select the "CMYK" option to define the colour composition and we tick the box "Define as spot colour alternate values". We give it "CMYK: 100/0/0/100" as color values. As a name, we call it "Cyan_black" (to know its composition).
By giving as alternate colour space these Cyan and Black proportions, when this spot colour is converted to CMYK, the process values it will take will be these same percentages of cyan and black. As simple as that.
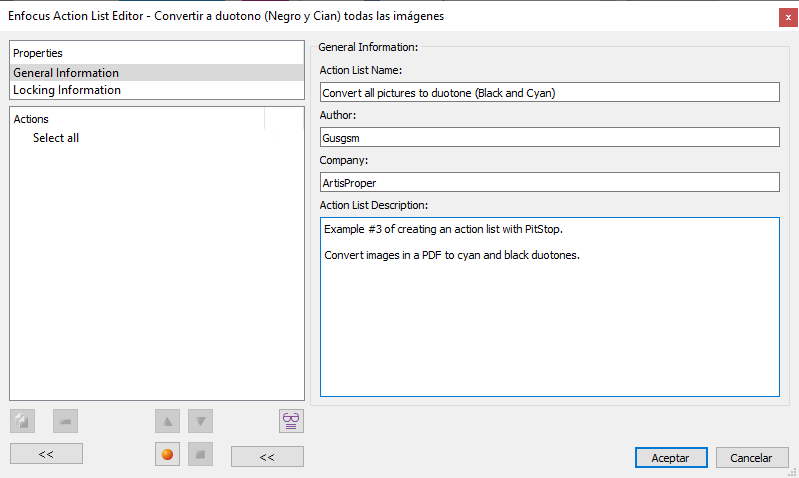
Now, we start by creating an action from scratch, with an open PDF (so we can see the results of what we do). We give it a meaningful name and add the necessary identifying data.
Selecting all the pictures
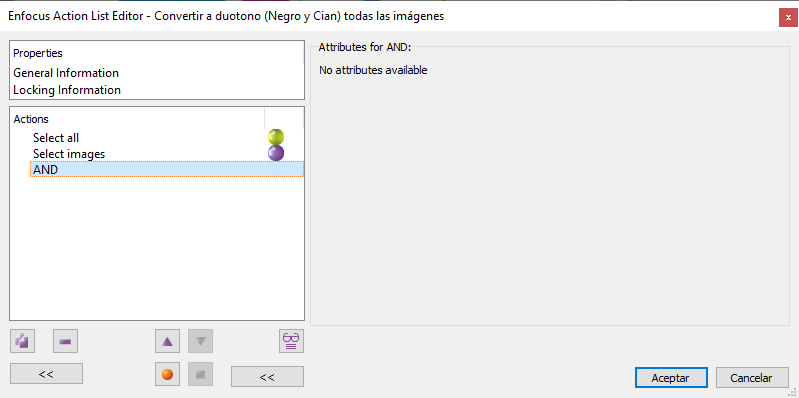
We will start by changing the pictures, so we have to make a new selection that includes only these types of elements. The way to select this is the sequence:
Which means: "Select everything and, from that, select only the pictures".
Changing the compression of the images so that they are not JPEG
This part of the list may seem incomprehensible or irrelevant, but if we do not include it and the images are in "JPEG" compression mode (as is the case in the vast majority of PDF files), when examining the resulting colour separations in a processed PDF, we would see that there are some artifacts in the yellow and magenta separations of the images (where nothing at all should appear as they should be empty). Changing the compression mode of the images to "ZIP" before altering them prevents these artifacts or scum ghosting from appearing.
In addition, this is useful to learn two important details in the elaboration of a list of actions:
- We must always examine the results in a processed PDF that includes sufficient details to avoid unwanted side problems when using a list real life workflows.
- the solution to a problem is not always obvious and it needs to be approached with a broad vision.
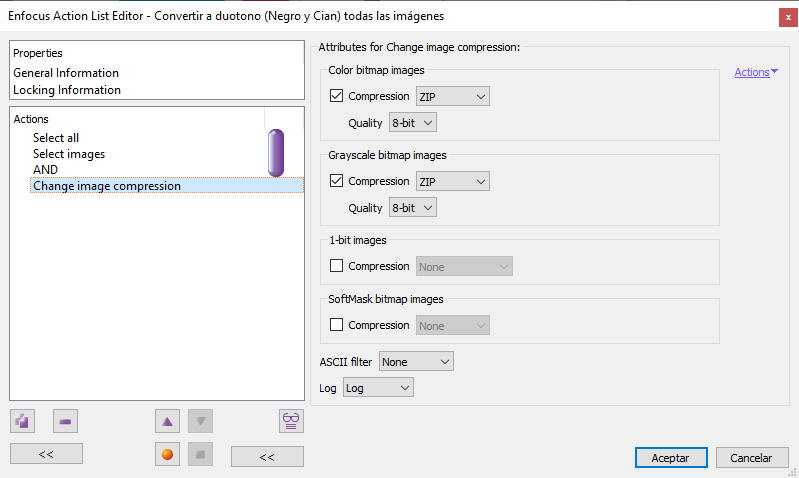
The command we apply is "Change image compression". We switch the first two formats in the list ("colour" and "greyscale" images) to "ZIP" compression, which is a lossless compression method.
Converting pictures to Cyan_Black spot ink
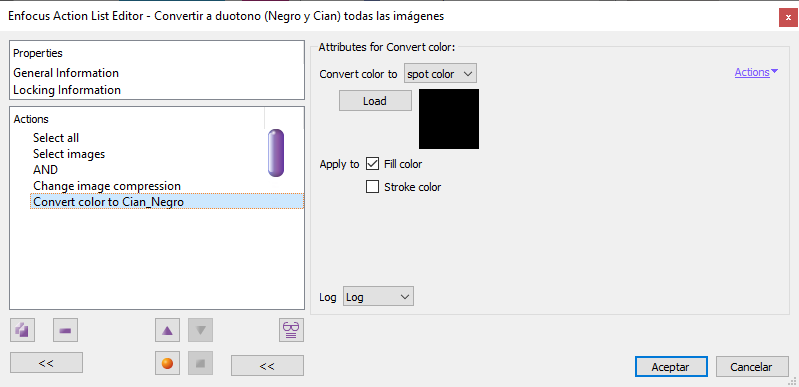
Next, we will apply to the images (which are still selected) the spot colour called "Cyan_black" using the command "Convert colour... to spot colour".
When we click "Load", we access the "Colour picker", which will have that colour available in the "Local" group.
Warning: We could have created the colour at this point in the process, but the problem is that PitStop is not always aware of the existence of a colour swatch if we create it on the fly. So it is safer to create it first.
Once located, select it and "OK".
Converting pictures to CMYK
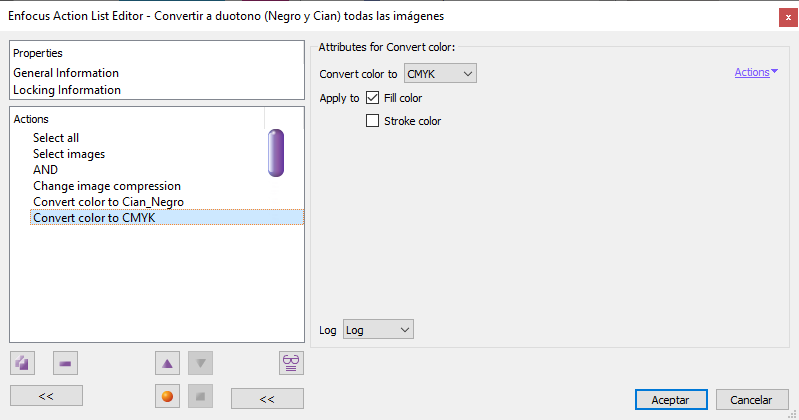
Now we will apply the same command as before: "Convert colour" but in this case to "CMYK" (but only the "Fill" as we are dealing with images (pixel objects)). As the spot colour "Cyan_black" has as "Alternate colour space" the values "CMYK: 100/0/0/100", what PitStop does is to convert it directly to its proportional equivalents of cyan and black.
Applying a cyan curve to pictures
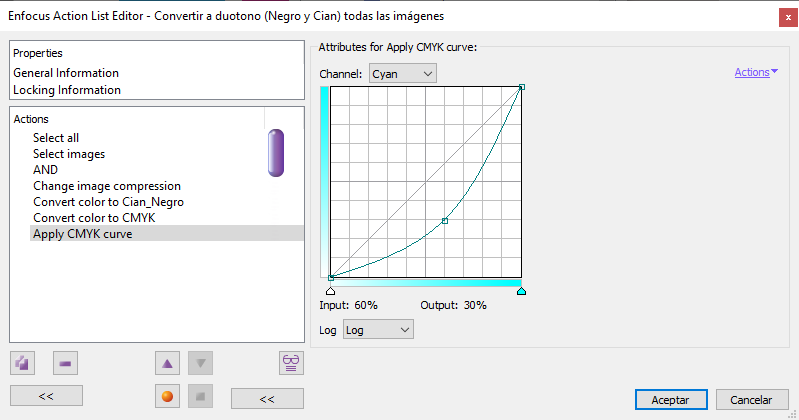
As mentioned above, pictures with a duotone in which both inks have the same percentage value are a bit dense and flat, lacking contrast. That is why we apply now a curve to the cyan (the mid-tones are reduced: what goes from 60% to 30%).
Warning: Here, whether or not to apply too a curve to the black and what values to apply to each of the inks is a matter of personal taste. If in doubt, it is a matter of playing around with the "Inspector" or examining the values of some of the default presets provided in Adobe Photoshop and copying them into PitStop.
Conclusion
We save the list by pressing the "OK" button and check its operation with the document we have open.
If we are satisfied with the result, we have finished this list of actions.
[© Gustavo Sánchez Muñoz, 2026] Gustavo Sánchez Muñoz (also identified as Gusgsm) is the author of the content of this page. Its graphic and written content can be shared, copied and redistributed in whole or in part without the express permission of its author with the only condition that it cannot be used for directly commercial purposes (that is: It cannot be resold, but it can form part as reasonable quotations in commercial works) and the legal terms of any derivative works must be the same as those expressed in this statement. The citation of the source with reference to this site and its author is not mandatory, although it is always appreciated.