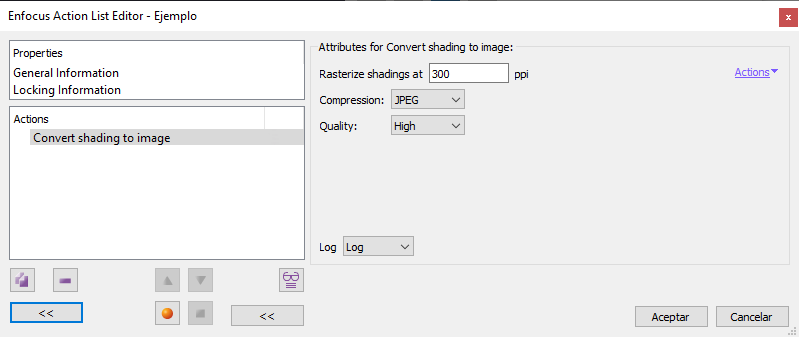
This Enfocus PitStop command allows us to rasterize the vector gradients of previously selected objects. If no object has been selected, this command may affect all objects of this type within its reach.
The result will be an image (pixel object) with the resolution chosen in the option "Rasterize shading to... ppi".
In the "Compression" option, we can choose four types of data compression used for pixel objects: "JPEG", "JPEG2000", "ZIP" and "None". For modes that support different degrees of compression intensity, we can choose various levels of "Quality" (the higher the compression, the higher the data loss and the lower the quality).
Gradient colours must be defined in RGB, greyscale or CMYK colours (with or without colour profiles). Other possible colour modes in a vector gradient (Separation, DeviceN or NChannel) cannot be not modified by this command.
Warning: Not all programs create vector gradients in the same way. For example, the most recent versions of Adobe InDesign create many vector gradients with NChannel colour space (even if their components are just process inks). So although they are originally in CMYK, this command does not modify them.
In such cases, the solution is to include a CMYK or RGB conversion of the gradients just before rasterizing them.
The resulting image will have the same colour type the vector gradient had (if the original colours were tagged with a colour profile, the resulting image will be tagged with the same profile).
In the case of masks and clipping paths, those parts of the gradients that were hidden are lost (as are the clipping paths). Everything is rasterized as a single image to preserve the presentation.
If the gradients are over other objects, these are not affected. The resulting image keeps transparent areas as such.
[© Gustavo Sánchez Muñoz, 2026] Gustavo Sánchez Muñoz (also identified as Gusgsm) is the author of the content of this page. Its graphic and written content can be shared, copied and redistributed in whole or in part without the express permission of its author with the only condition that it cannot be used for directly commercial purposes (that is: It cannot be resold, but it can form part as reasonable quotations in commercial works) and the legal terms of any derivative works must be the same as those expressed in this statement. The citation of the source with reference to this site and its author is not mandatory, although it is always appreciated.