This Enfocus PitStop command allows us to paste along an object or element previously selected into the chosen areas of a PDF. The pasted graphics can be vector graphics, pixel images or text segments.
A typical use of this action is selecting a batch of pages and pasting in them a graphic (such as a watermark saying "confidential" or "draft"), a logo, a box with a text as a page turner, etc.). It is very convenient when we have to add the same object on many pages at once.
It is highly configurable and very fast. These are its options, grouped in five tabs: (1) Graphics, (2) Attributes, (3) Region, (4) Repeat and (5) Position.
1. Graphics
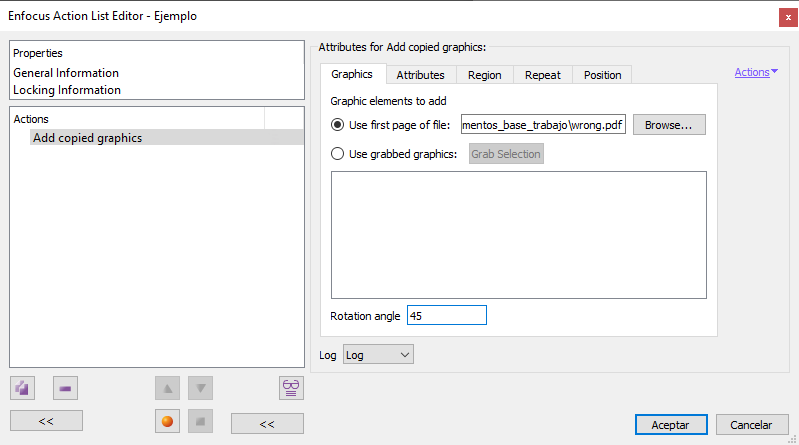
In this section we select the graphic to be used for the action. This graphic can only be selected using one of the two procedures in this section. Graphics stored in the clipboard cannot be used nor can graphics previously selected with another action.
Besides, this graphic must be ready-to-use in size or colour, as the command does not allow us to modify them in this regard.
It can be a vector graphic, a pixel image or a text segment.
The first option, "Use the first page of file" allows us to use whatever has been placed on the first page of a multipage PDF on the system and whose path is chosen here. With this method we can have a library of single-page PDFs containing graphics to paste at our convenience.
The PDF will be pasted as is, i.e. if it has transparencies applied, it will be placed applying them.
The second option, "Use grabbed graphics", allows us to add selected objects from this or another PDF that is open at the same time. The object must be selected with the selection arrow ("Select objects") in the PitStop "Inspector". If it is not, we will not be able to add it. This object can complex or simple.
With the "Rotation angle" checkbox, we can set the graphic to be placed applying a rotation with an specific amount of degrees.
2. Attributes
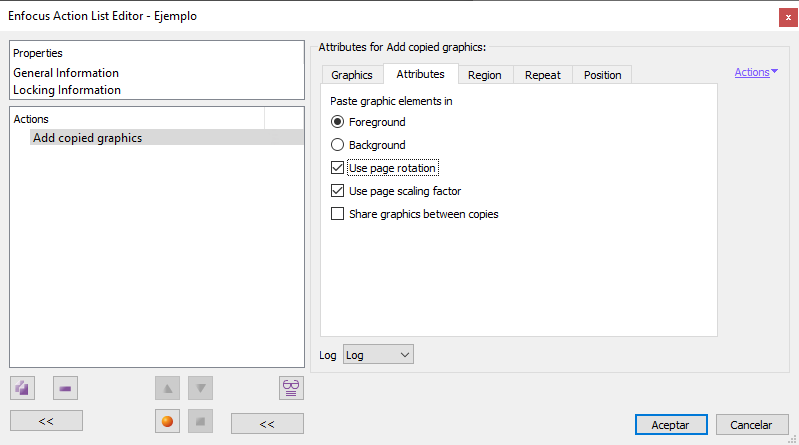
In this area we specify whether we want the graphic to be pasted in front ("Foreground") or behind ("Background") the existing content.
If we check the box "Use page rotation", any existing rotation factor will be used and applied to the graphic. Thus, if the page has been rotated 90º and we want the graphic to be rotated 45º, both rotations will be taken into account.
The "Use page scaling factor" checkbox will make PitStop to take into account any scaling factor applied to the pages (each page independently).
If the "Share graphics between copies" checkbox is on, the graphic will be saved only once in the document structure (as a form XObject) to be referenced in each placement. This option saves a lot of space, especially if the copied graphic is repeated many times in the pasting (with the options we can see below).
A likely drawback is that, if we are going to modify the graph later, that change will affect all instances, as they refer to the same object.
3. Region
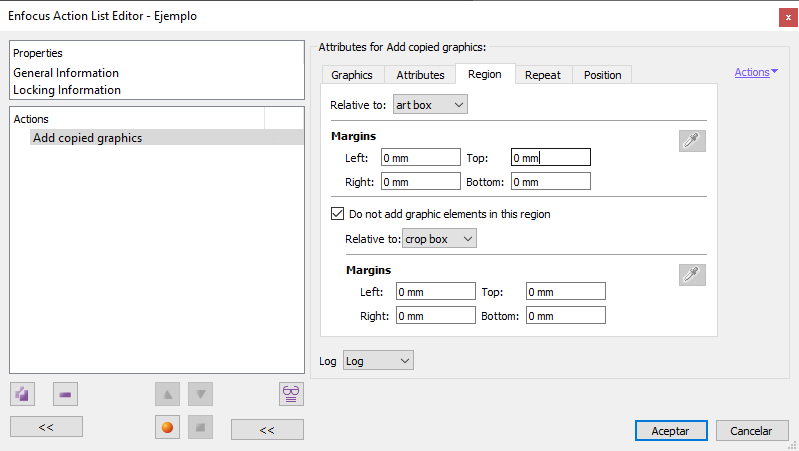
In this section we can restrict the area in which the graphics will be placed. If the delimited area is too small, the graphics will not be cropped; either they fit or they don't. If there is no room for any of them, the action will fail and nothing will be placed.
But, if we do not set the area (i.e. we left the "Margins"at "0 mm"), all objects that do not fit on the page will overflow and they will be left out and clipped.
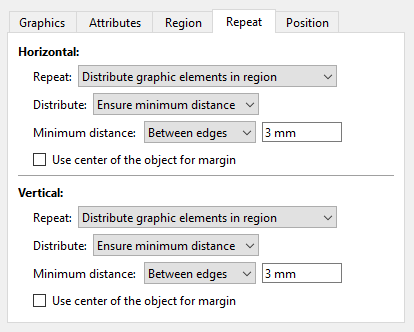
4. Repeat
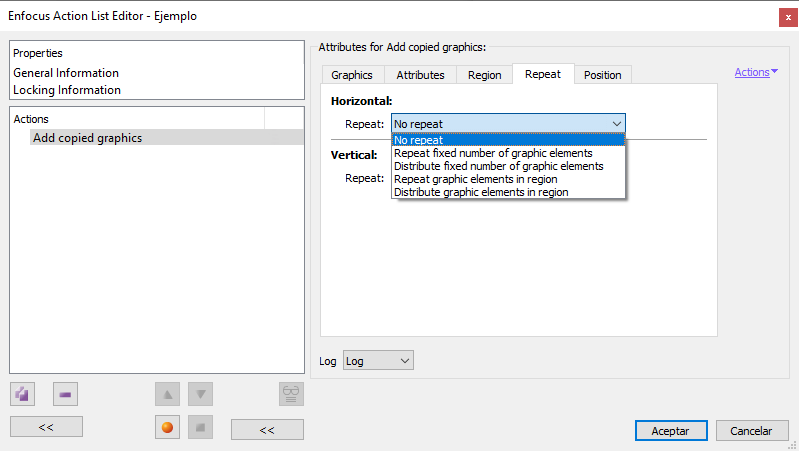
This area allows us to decide whether we want the object to be pasted by repeating it on each page with the options defined here in two sections: "Horizontal" and "Vertical".
Note: As with many other parameters, these distances can be defined with variables.
"No repeat". Wtih this option the placed element is not duplicated. Only one instance is placed
"Repeat fixed number of graphics elements": If we ask for a number and spacing of objects that do not fit in the zone, the objects will overflow the page.
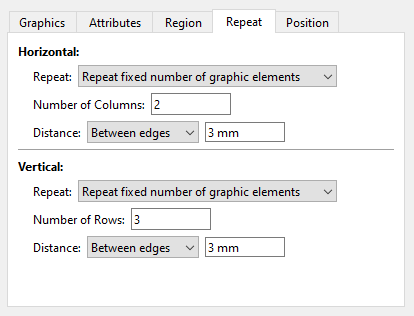
We can decide how many repetitions we want by entering the number of columns (horizontal) or rows (vertical).
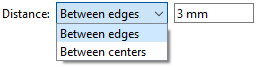
The "Distance" between elements can be indicated with respect to the "Edges" of the graphic to be pasted or with respect to its "Center".
Warning: the distance is measured using the vertical or horizontal axes of the page, not of the object (even if it is rotated).
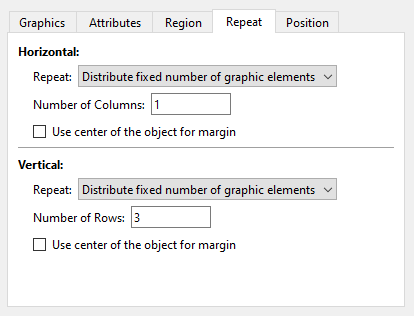
"Distribute fixed number of graphic elements": l
This option distributes the number of elements horizontally or vertically across the page as specified for each of both axis.
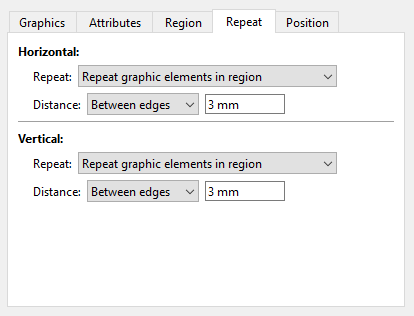
"Repeat graphic elements in region": L
The same as the first option but restricting the repetition to the areas defined in the "Region" zone. If we as for a number and spacing of objects that do not fit in the zone, the command will yield no result.
"Distribute graphic elements in region": The same as the second option but now restricting the repetition to the areas defined in the "Region" zone. We can choose also the "Distance" between elements with respect to their "Edges" or "Centres".
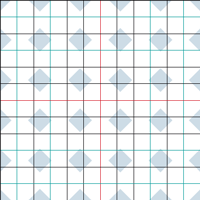
Examples of the use of the region and repeat options
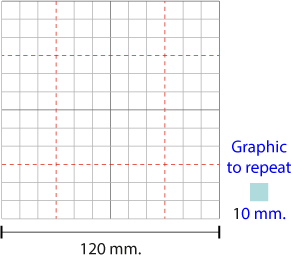
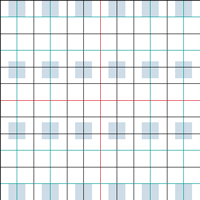
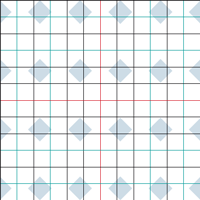
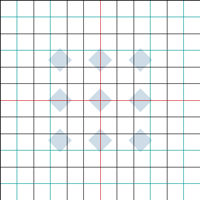
To better understand how these "region" and "repeat" options work, here are some examples of their use by pasting as a graphic a 10 mm square in a PDF of 120 mm side with a grid of lines every 10 mm. On the right there is always the result of the same options but rotating the graphic by 45º.
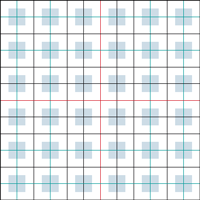
"Repeat": Repeat fixed number of graphic elements: Columns and rows 6. Border spacing: 10 mm.
"Repeat": Horizontal: Repeat fixed number of graphical elements: Columns 6. Vertical: Distribute fixed number of graphic elements: Rows 4.
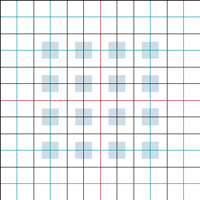
"Region": Left / Right / Top / Bottom / Top: 20 mm. "Repeat": Repeat the graphic elements in the region. Distance between edges: 10 mm.
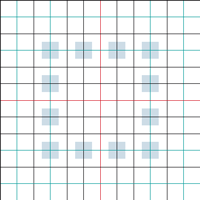
"Region": Left / Right / Top / Bottom / Top: 20 mm. "Do not add graphic elements in the region: Left / Right / Top / Bottom: 40 mm. "Repeat": Repeat the graphic elements in the region. Distance between edges: 10 mm. The option with the rotated graphic does not exist because the action fails as there is no place to put them.
5. Position
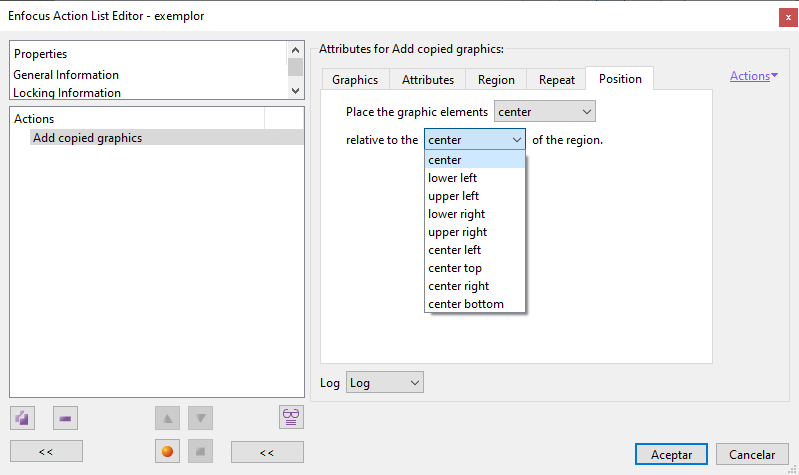
In this area, we choose where we want to start placing the graphics. There are two placement criteria, which interact with each other. They seem to behave in the same way (though they do not), which is a bit misleading.
"Placement of the graphic elements" is the most difficult to understand. The easiest way to get it right is to think backwards: If we want to place it to the upper left (top) of the area we have chosen, we should ask for "Lower right". It's as simple as that.
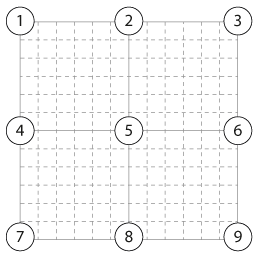
"Relative to [criterion here] of the region" indicates in which area of the page it is to be placed. This criterion is simple, as can be seen in the diagram above: (1) Top left, (2) Top centre, (3) Top right, (4) Centre left, (5) Centre, (6) Centre right, (7) Bottom left, (8) Bottom centre and (9) Bottom right.
Warning: If we have used any "Repeat" option, we must use the same location in both parameters, i.e. if we want to "Place graphic elements" in the upper left corner, the "Relative to" value must also be the upper left corner. Otherwise, PitStop considers it an error and the action will fail.
Examples of the use of position options
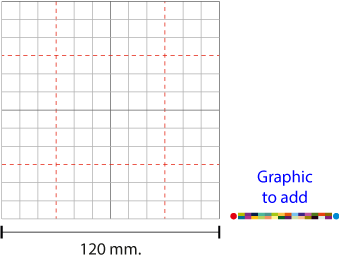
To better understand how these options work, here there are some examples of their use by pasting a 60 mm long colour strip as a graphic on a 120 mm sided PDF with a line grid every 10 mm.
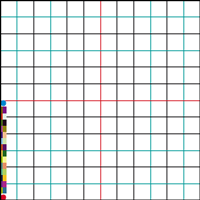
(Graphic "Rotated" 90º). "Position:" lower left "Relative to" the lower left "of the region".
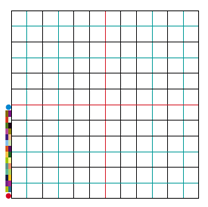
(Graphic "Rotated" 90º). "Position:" lower right "Relative to" the lower left "of the region".
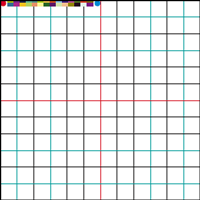
(Graphic not rotated). "Position:" Upper left "Relative to" the upper left "of the region".
[© Gustavo Sánchez Muñoz, 2025] Gustavo Sánchez Muñoz (also identified as Gusgsm) is the author of the content of this page. Its graphic and written content can be shared, copied and redistributed in whole or in part without the express permission of its author with the only condition that it cannot be used for directly commercial purposes (that is: It cannot be resold, but it can form part as reasonable quotations in commercial works) and the legal terms of any derivative works must be the same as those expressed in this statement. The citation of the source with reference to this site and its author is not mandatory, although it is always appreciated.